Network Browser Setup Instructions
Network Browser from Ape Apps is quickly becoming the number one network management and media streaming app for Android, but many users are confused as to how to successfully set up a network connection between their computer and their Android device. The following instructions show how to establish a network link using Network Browser for Android and the Windows operating system.
Step 1: Install Network Browser
Obviously the first step is you need to download and install the free Network Browser app onto your device. It is available for both Android and Kindle devices:
Step 2: Enable Sharing on your PC
If you already have a home network up and running then you can skip the next couple of steps. On some Windows installations, network sharing is disabled by default for security purposes. To enable it, do the following:
- Open the Control Panel on your PC and click on Network and Internet.
- From the Network and Internet screen. click on the Network and Sharing Center option.
- On the Network and Sharing Center screen, you should see a Change advanced sharing settings option on the right hand side. Click on it.
- Scroll down to the Password protected sharing section and put a check in the Turn on password protected sharing option.
Step 3: Share a folder
This step is simple. Once sharing is enabled on your PC, right click on a folder you would like to share, and select Properties. From the properties window, select the Sharing tab, and click on the Share button at the top:
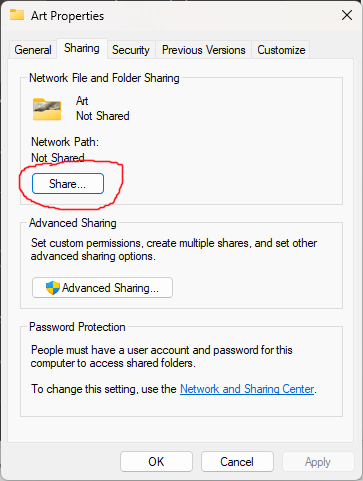
In the File Sharing window that opens up, select users that you would like to share the folder with (choose an account you have access to) and then click on the Share button on the bottom right corner.
Step 4: Note your IP address
In many cases, Network Browser will automatically discover your PC at this point. On some networks though, you will need to set up a manual connection using your IP address. To find it, open the Terminal app on your computer (you can do this by pressing the windows+R keys, and then typing "cmd" in the run window). From there, type ipconfig and press enter. There will be several options that come up. If you are on Wireless, you will want to find the section that is labeled Wireless LAN. It might look something like this:

The value you are interested in is the IPv4 Address. It will probably be something like 192.168.x.x, unless you have a more customized setup, in which case you probably already know what your IP address is.
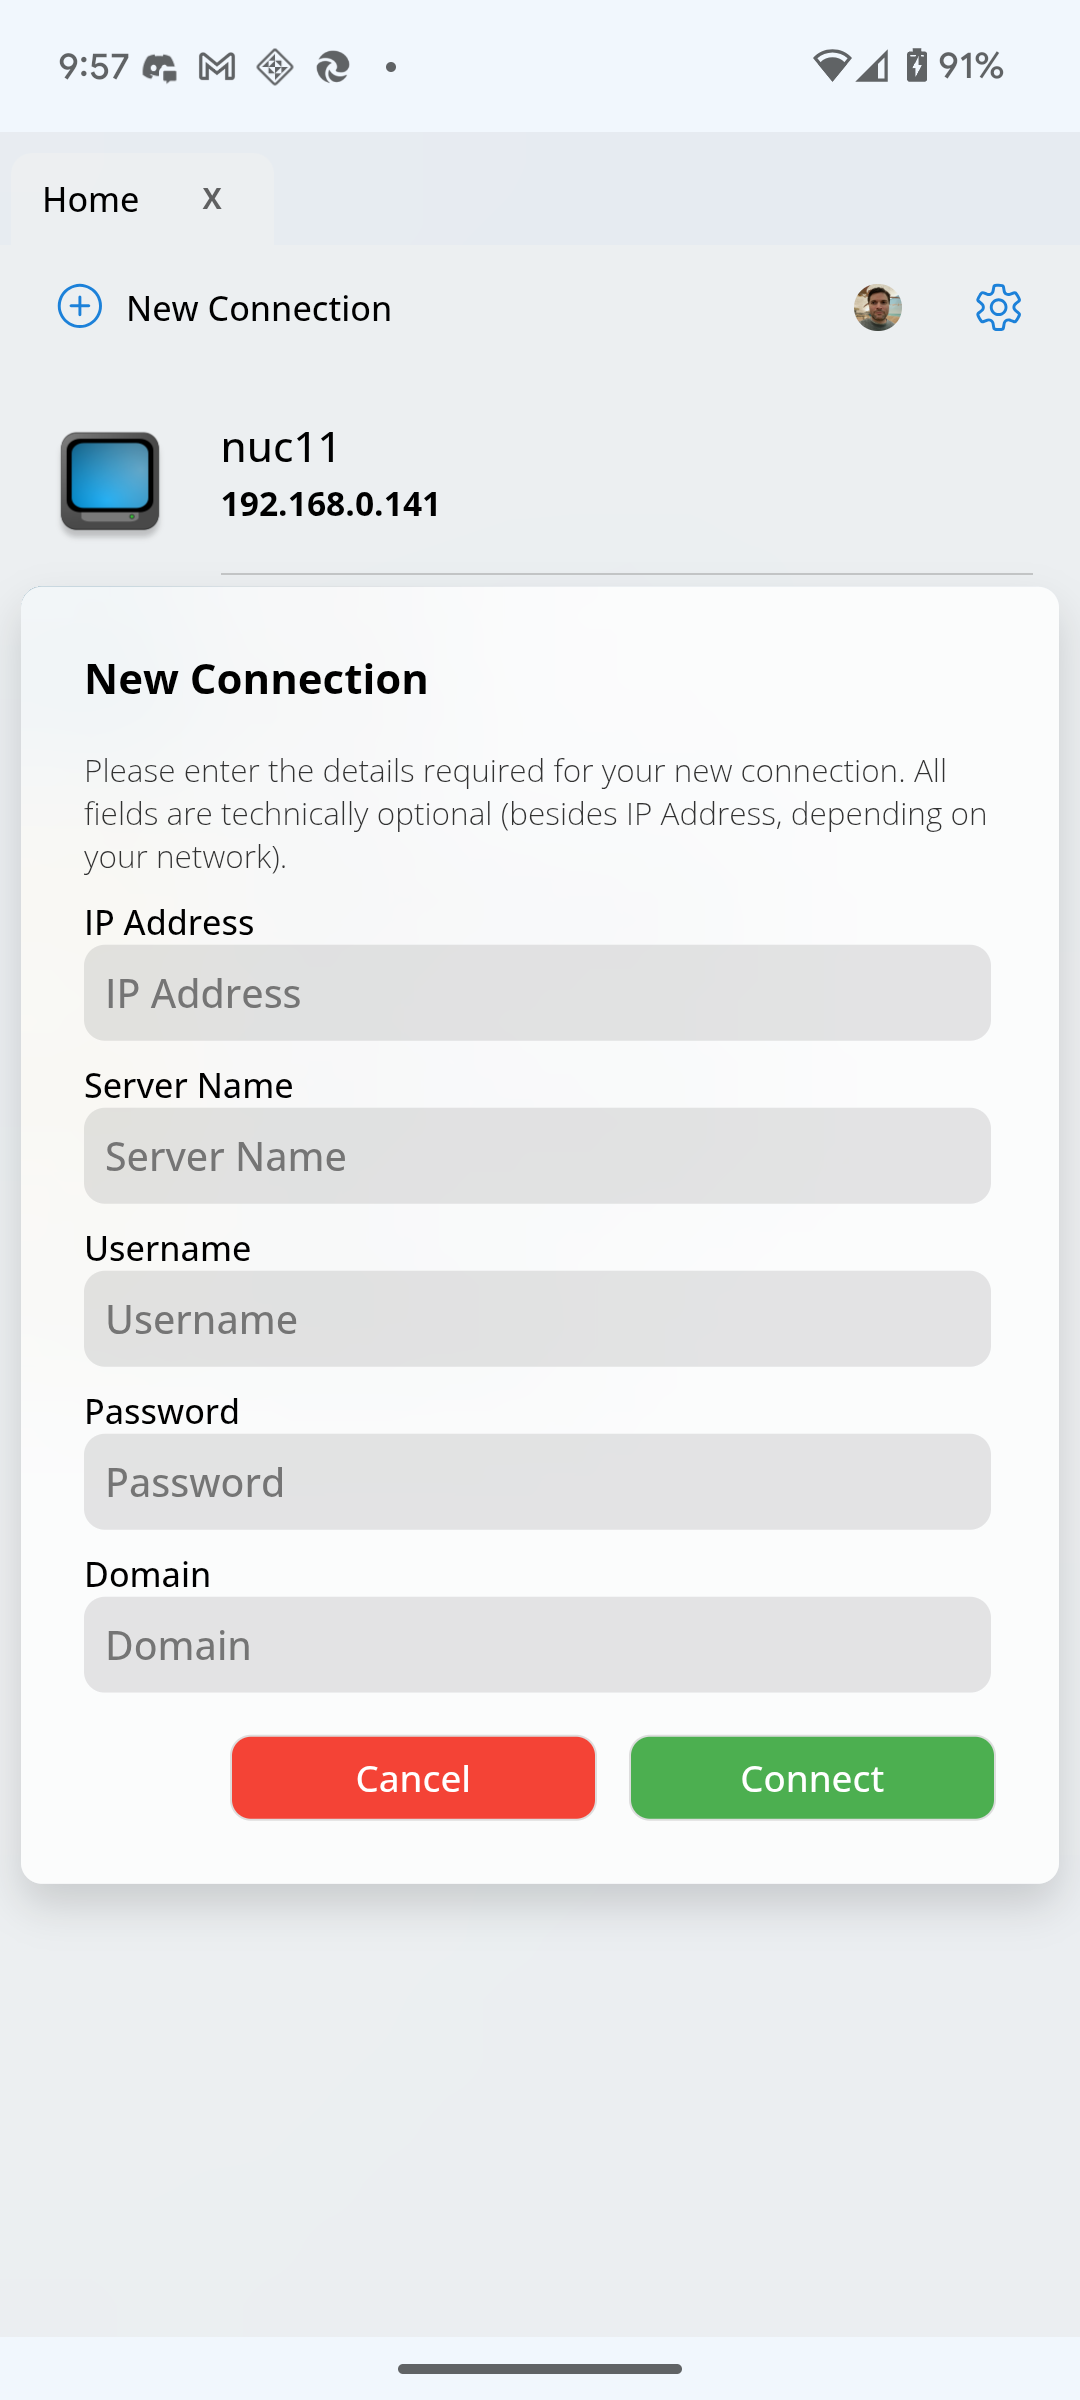
Step 5: Set up Network Browser
Open up Network Browser on your Android device. At this point the app may automatically discover your PC. If so, great! You're done. Otherwise, tap on the New Connection button on the main toolbar at the top of the Network Browser screen.
Step 6: Fill out your network settings
The last step is to input your PC information into the app. The IP Address will be where you type in the IP address you marked down earlier. Server Name can be anything you want to help you identify the server. Username and Password will be the Windows account settings for the user that you added to your shared folder back in step 3. On many modern Windows installations, this will be your Microsoft account and password. Domain will be blank in most cases.
Step 7: Enjoy
For the most part, that should be it. Setup will vary by operating system and version, but it should be similar for most platforms.
Need additional help? If you are having problems, feel free to join the official Ape Apps Discord channel and ask your questions there!