Find User
here you can look for a user
Ape Web Apps Desktop Bridge Setup Instructions

What is it?
The Ape Web Apps Desktop Bridge adds extra functionality to apps and games hosted on apewebapps.com and those downloaded from the Windows Store, giving them additional features and capabilities normally only available in the native client versions of the apps and games. These features include things like offline file-system storage access and peer-to-peer connectivity over local area networks (think offline LAN multiplayer). These features are generally unavailable to web and store apps due to web browser security standards.
Who is it for?
The Desktop Bridge was created by @bastecklein to allow for testing native cross-platform features while doing development on the web. It was previously too archaic and technical for distribution. However, with upcoming online and offline multiplayer features for games such as My Colony, Antiquitas, Colony Wars, and Death 3d, it would be impossible for web-only users of these games to use their full feature-sets.
Do you need it?
It is important to keep in mind that using the Ape Web Apps Desktop Bridge is still somewhat technical, and in most cases it is preferable to just install a native client version of the app or game you are wanting to use. Setup requires installing a security certificate authority to your operating system or browser of choice, a step which some users may be uncomfortable with. But for some circumstances where you either cannot use a native version of the app or you just prefer the web or store version, the Ape Web Apps Desktop Bridge is available to unlock full desktop-class functionality for software hosted on apewebapps.com.
Installation
The Ape Web Apps Desktop Bridge is available for free to download from the Ape Market at this url: https://market.ape-apps.com/ape-web-apps-desktop-bridge.html . It runs on most recent 64bit editions of Windows, macOS, and Linux.
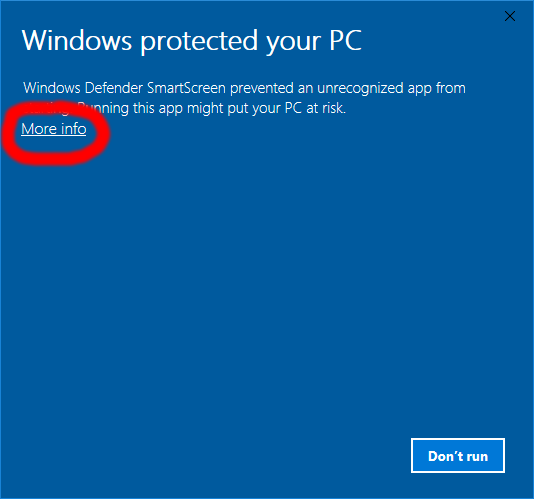
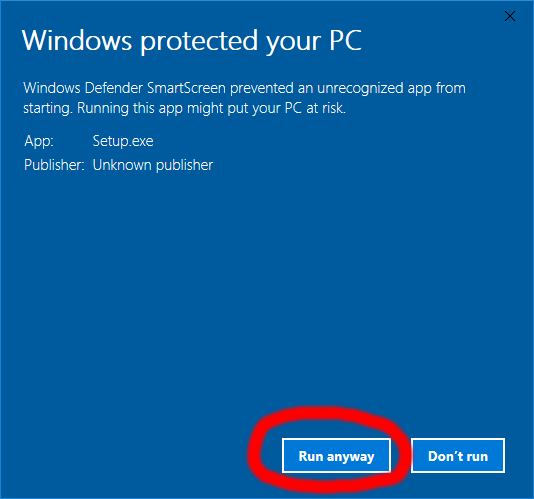
The installer is not digitally signed with any certificates, so you have to allow installation manually if you get a security warning. On Windows, it will look something like this:
Certificate Installation
In order to actually use the Desktop Bridge, you must install a security certificate onto your PC. Why? Ape Web Apps is hosted on a secure (https) domain, and as such can only interact with resources which contain a valid security certificate. A similar restriction applies to Windows Store apps. With the Ape Web Apps Desktop Bridge, you are essentially hosting a secure server on your own desktop that acts as a middle man between the game and your PC. Most home users don't have to install certificates on their own machines, although it is a lot more common in corporate network environments. The bridge will not work properly without the certificate, so if you are not comfortable with this step, then you might as well not continue.
Certificate installation will be different depending on your operating system and environment, but below are some common installation scenarios. You can probably get enough information here to make it work on any platform.
The first thing you have to do on all platforms though, is download the certificate authority used to validate the Desktop Bridge application:
The next step will depend on your environment.
Windows
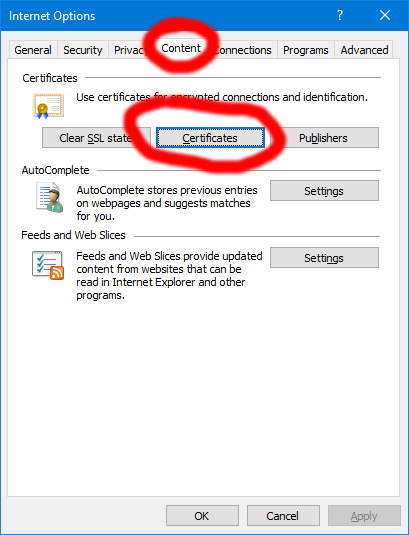
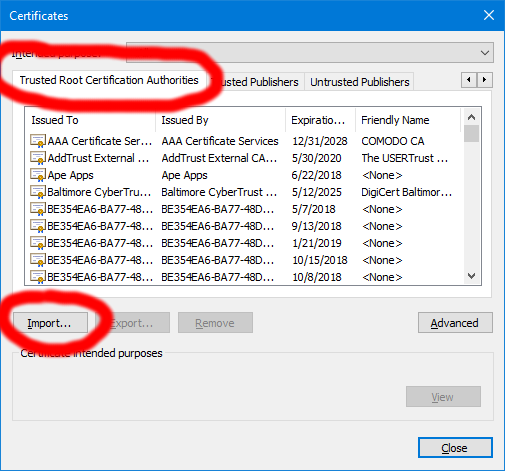
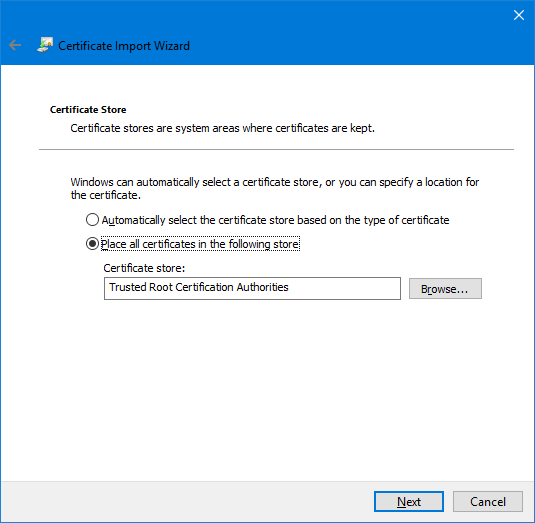
To install the certificate on Windows, you will need to open the Control Panel and go to the Internet Options application. In the window that comes up, select the Certificates button in the Content tab.
macOS
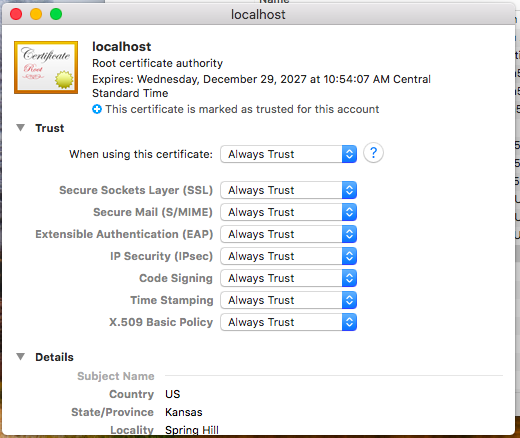
Installation on a Mac is quite a bit less involved. You generally just have to double click on the certificate file you downloaded. It should open up the Keychain Access application and ask which keychain you want to install the certificate to. You will use the login keychain.
Then in the Keychain Access window, select login on the left side, find the new localhost key, and double click on it. In the window that opens, expand the Trust section and change the setting to 'Always Trust.'
Linux
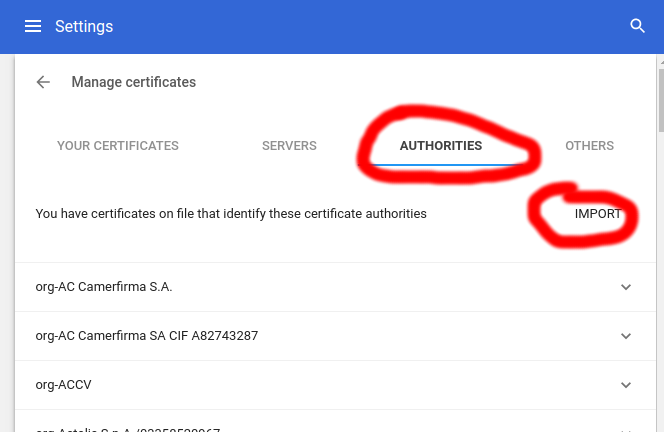
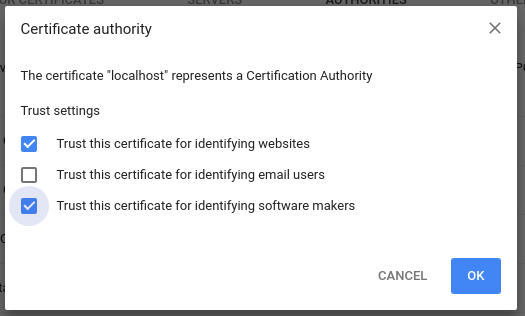
On Linux, installation will differ based on distro. On some distros, you may be able to just double click on the downloaded certificate and import it to your keychain and be done with it. Whether or not the web browser will accept the certificate is another matter. For Chrome on Ubuntu, I had to actually install the certificate into Chrome itself, which was a simple matter. On Chrome, navigate to the chrome://settings/ page. From there, scroll to the very bottom and expand the Advanced section. Scroll down further to the Privacy and Security section and click on Manage certificates. From there, go to the Authorities section and click on Import.
Filesystem
When the Desktop Bridge is running, applications on Ape Web Apps (not Windows Store apps) will save all files and game data into the Documents folder for your desktop user. Files are also stored internally into the browser just in case, and may also be synced to the Ape Apps Cloud depending on the application.
Questions/Comments/Suggestions
Use this thread for all discussion related to the bridge. If it gets enough activity I can make a dedicated forum section for it, but right now for the benefit of all, keep all discussion in the same place.
Final Note
Remember that the Ape Web Apps Desktop Bridge minimizes and closes to the system tray. You should consider closing it when it is not in use, both to free up system resources and for security. You should get a system notification whenever a client connects to the bridge, although the notifications may not work properly on all systems.
Update History
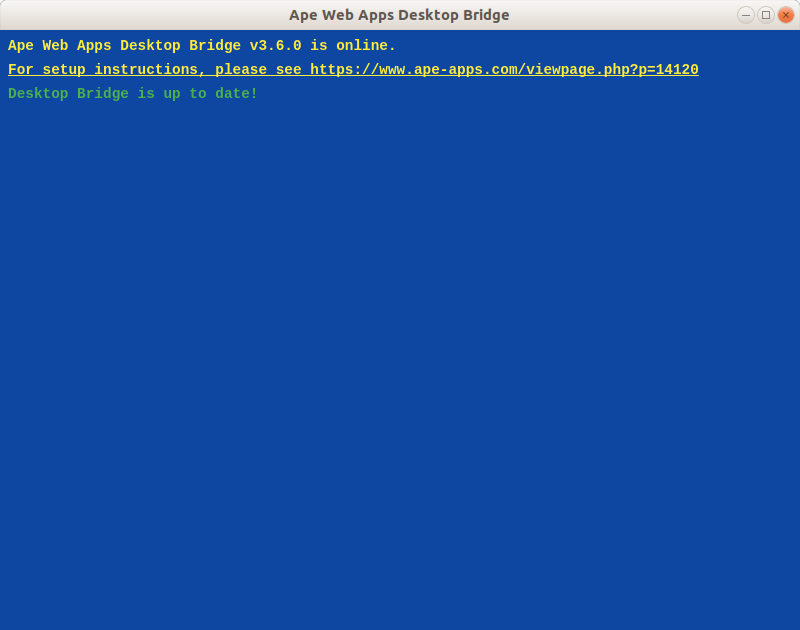
- v3.6.0 - 20180129: First public release
Owner of Ape Apps, LLC
I followed all the steps listed. I downloaded the desktop bridge, and the certificate, added the certificate to the list of trusted certificates and the desktop bridge still behaves like it would without the certificate.

Hello! I am a High Wizard from the Nations of OZ, come check out our discord server! https://discord.gg/qqCswpF